
Join Stackmode Trading School and learn the exact level-identification framework our traders use daily, with live chart walkthroughs, real trade setups, and step-by-step guidance.
Quick Answer: How Professional Traders Use Levels
Professional traders use key price levels as decision zones — not entry triggers on their own. They identify areas where price has repeatedly reversed on higher timeframes (daily and 4-hour), look for confluence where multiple timeframes agree on a zone, and then wait for a confirmation candlestick signal before entering. They do not buy every time price touches support — they buy confirmed rejections at high-quality levels.
The difference between a retail trader and a professional is not the indicators they use — it is their ability to identify significant price levels and wait patiently for price to react at those zones before committing capital.
Watch: How Professional Traders Use Levels (Full Breakdown)
In this video, I show exactly how I identify key levels on a live chart — from finding swing highs and lows, to marking flip zones, to applying multi-timeframe analysis. This is the same level-reading process I use for every trade I take.
What Are Price Levels in Trading?
A price level (also called a support or resistance zone) is a price area where significant buying or selling has repeatedly occurred. These zones form because traders have memory — anyone who bought at a previous support level and watched price fall through it now has that level burned into their consciousness. When price returns there, they react.
Levels are not random lines. They form at specific locations because of real market events: prior swing highs and lows where price reversed, consolidation ranges where thousands of traders accumulated or distributed positions, round numbers that attract algorithmic orders, and high-volume nodes where the most trading occurred over a period.
The reason levels work across different markets and instruments is that they reflect collective human psychology — specifically, the tendency of traders to remember where price has reacted before and place orders at the same zones again.
How Professional Traders Identify Key Levels
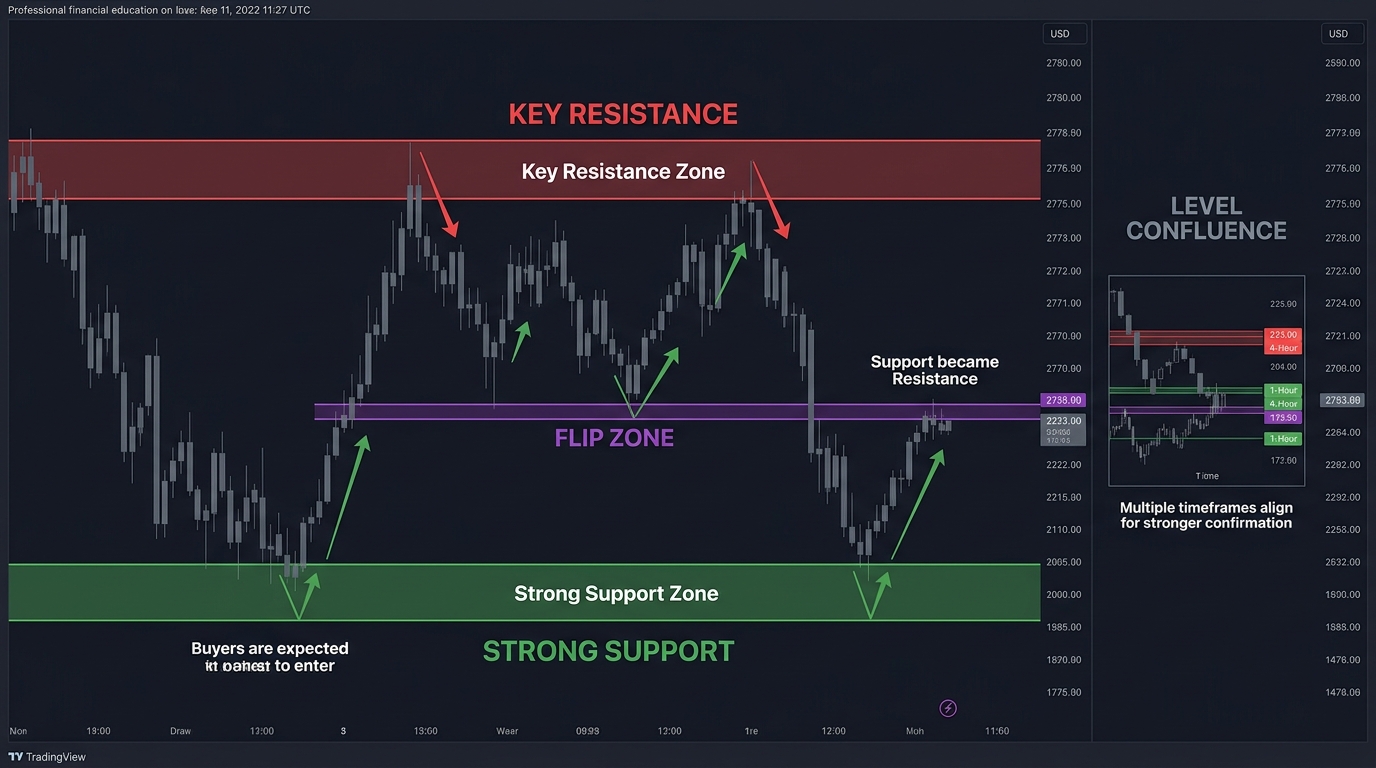
Here is the exact process professional traders use to identify levels on any chart:
- Start on the daily chart and scroll left. Find the three to five most obvious areas where price reversed sharply — these are your primary levels. Mark them as zones (a shaded area spanning 1–3% of price), not as single lines.
- Identify swing highs and swing lows. A swing high is a candle with a higher high than the two candles on either side. A swing low is the opposite. These are your structural reference points — the building blocks of all level analysis.
- Mark prior consolidation ranges. Any area where price moved sideways for an extended period (more than 5–10 candles on the daily) is a high-interest zone. A lot of orders were placed there; price will often return to it.
- Note prior all-time highs and lows. In any market, previous ATHs and ATLs act as powerful magnets. Price tends to gravitate toward, test, and either break through or reject strongly from these zones.
- Drop to the 4-hour chart and refine. With your daily levels marked, use the 4-hour chart to get more precise boundaries for your zones. This is where you decide the exact price range of your entry zone.
Multi-Timeframe Confluence: The Professional's Edge
Confluence is the most powerful concept in level-based trading. When a price zone is significant on multiple timeframes simultaneously, the probability of a meaningful reaction at that zone increases substantially.
Example of a high-confluence level:
- A prior swing high on the weekly chart (very significant)
- A prior all-time high that was recently broken (flip zone candidate)
- A 4-hour chart consolidation range top that aligns with the weekly level (matches exactly)
- A round number ($50,000, $100,000) at the same price zone
Each individual signal is useful on its own. When all four align at the same price zone, you have a level that professional traders, algorithms, and institutions are all watching simultaneously. The more eyes on a level, the stronger the expected reaction — and the more reliable it is as a reference point for your trade plan.
Confluence Rule:
A level is worth trading when it has at least two independent reasons to be significant. A level with only one reason is a level to watch, not to trade from.
Flip Zones: The Most Reliable Price Levels in Any Market
A flip zone occurs when a support level is broken and then acts as resistance when price returns — or when a resistance level is broken and acts as support. Flip zones are considered the highest-quality levels because they are backed by two distinct groups of market participants reacting to the same price zone.
Why flip zones work:
- Trapped buyers: Traders who bought at the old support zone got stopped out when the level broke. When price rallies back to that zone, they sell to "get out even" — creating selling pressure at what was previously support.
- New sellers: Traders who shorted the breakdown also use the broken support zone as their target for adding to short positions on a retest.
- Algorithm orders: Many algorithmic systems place orders at prior structural levels, reinforcing the reaction.
The best flip zones to trade are the ones where the initial break was decisive (a strong momentum candle through the level) rather than a slow grind. A strong break creates more trapped traders — and more trapped traders means a stronger reaction on the retest.
See our full guide on how to find key levels of support before price traps you.
Using Levels for Trade Entries and Exits
Identifying a level is only half the work. Using it profitably requires a structured process for entries and exits:
- Wait for price to arrive at a pre-marked level. Do not mark levels after price is already there — the level must be marked in advance to have analytical value.
- Wait for a confirmation candlestick. A pin bar (rejection wick), an engulfing candle, or a clear close above/below the level on volume. Do not enter on touch alone — you will catch many failing levels if you do.
- Place your stop-loss beyond the level. If you are buying at support, your stop goes below the lowest point of the support zone. This way, if the level breaks, you exit before the full breakdown move.
- Target the next significant level. Your take-profit target should be the next meaningful resistance zone (for a long trade) or the next support zone (for a short trade). Aim for a minimum 1:2 risk-to-reward ratio.
- Move stop-loss to breakeven once the trade moves 1:1. Once price has moved in your favor by the amount you risked, move your stop to your entry price. This removes the possibility of a loss on the trade and allows you to run for additional gains.
Strong Levels vs. Weak Levels: How to Tell the Difference
| Characteristic | Strong Level | Weak Level |
|---|---|---|
| Timeframe visibility | Visible on daily or weekly chart | Only visible on 15M or 1H |
| Number of touches | 3 or more historical touches | 1–2 touches, may be coincidence |
| Confluence signals | 2+ confluences (round number, flip, etc.) | Single-reason level |
| Historical reaction | Strong wicks / sharp reversals | Gradual, indecisive reactions |
| Volume at level | High-volume reactions historically | Low or average volume reactions |
Common Mistakes Traders Make with Levels
- Drawing too many levels: Every minor price pause becomes a level. This creates a chart with so many lines it is impossible to act on. Be selective — only mark levels with clear historical significance.
- Entering on touch instead of confirmation: Buying or selling the instant price touches a level, without waiting for a rejection signal. Levels can break — you need confirmation that the level is actually holding before committing capital.
- Ignoring the trend: Buying at support in a strong downtrend. Levels work best when you are trading in the direction of the higher-timeframe trend. Trading counter-trend at levels is a lower-probability activity.
- Moving stop-loss below the level after entry: Entering at a support zone with a stop-loss properly placed below it, then moving the stop further down when price dips. This turns a structured trade into an emotional holding position.
Honest Limitations: What Levels Cannot Do
Important Risk Disclosures
- No level is guaranteed to hold. Every support and resistance zone can be broken — especially in crypto where whale moves, news events, and liquidation cascades can override technical structure instantly. Always use a stop-loss.
- Level analysis is subjective. Two experienced traders can look at the same chart and mark different levels. There is no single correct way to draw levels. The goal is to identify the zones most participants are watching, not to find a perfect line.
- Markets evolve. A level that held 10 times in the past can fail on the 11th test because market conditions, participant composition, or macro factors changed. Historical significance is a probability guide, not a rule.
- This article is for educational purposes only and is not financial advice. Trading involves significant risk of capital loss. Only trade with money you can afford to lose entirely.
FAQ: How Professional Traders Use Levels
What levels do professional traders use?
Professional traders primarily use structural price levels: swing highs and swing lows from the daily and 4-hour charts, areas of prior consolidation, and zones where price has reversed multiple times. They also watch round numbers, prior all-time highs and lows, and areas of high liquidity. The key is that levels must be visible on higher timeframes — not just on 5-minute charts.
How do you find key support and resistance levels?
Scroll left on your chart to find areas where price reversed sharply or consolidated for an extended time. Mark those zones (not exact lines). The more times price has touched and respected a zone, and the more timeframes that zone appears on, the more significant it is. Strong levels are visible on the daily chart without zooming in.
What is a flip zone in trading?
A flip zone is a price level that acted as support, was then broken decisively, and now acts as resistance — or vice versa. This happens because traders who previously bought at support (and got stopped out when it broke) will now sell at that same level when price returns to it. Flip zones are among the most reliable and predictable locations in any market.
What is multi-timeframe confluence in levels?
Confluence means a key level appears as significant on more than one timeframe simultaneously. For example, if a price zone is a daily support level AND a 4-hour resistance level AND aligns with a prior all-time high — that zone is far more significant than one that only shows on a single timeframe. The more confluences at a level, the stronger the expected reaction.
How do professional traders enter trades at levels?
Professionals do not buy the moment price touches a level. They wait for confirmation — a candlestick pattern (pin bar, engulfing candle, or rejection wick) that signals price is actually respecting the level. This reduces the risk of buying into a falling knife. The entry is placed after confirmation, with the stop-loss below the level being tested.
How do you know if a level will hold or break?
There is no guaranteed way to know in advance. Signs that a level may hold include: price arrives with decreasing momentum, a rejection candlestick forms at the zone, volume spikes on the rejection candle, and the level is visible on multiple timeframes. Signs it may break include: price approaches with strong momentum, prior tests of the level have been getting closer together, and volume is high on the approach.
How many levels should I mark on a chart?
No more than three to five significant levels at any time. Charts covered in dozens of lines are useless for making trading decisions. Mark only the levels that clearly show multiple touches on the daily or 4-hour chart. Remove levels that price has moved far away from — they become less relevant the further price travels from them.
Can levels work for crypto as well as stocks?
Yes. Price levels work in any freely traded market because they reflect human psychology — where traders have previously bought, sold, been stopped out, or taken profits. Crypto can move faster and more violently than stocks, but the structural logic of support and resistance is identical. The main difference is that crypto levels can break more aggressively during news events or low-liquidity periods.
Best-Fit Framework: What This Topic Can and Cannot Tell You
How Professional Traders Use Levels (The Real Method) is best understood as an educational framework: define the decision, compare the available choices, verify current evidence, and keep the downside explicit before acting.
| Option or lens | Best for | Honest limit |
|---|---|---|
| Definition | Clarifying what the topic actually means | A definition does not predict a market outcome. |
| Process | Turning the idea into repeatable research steps | A process still depends on execution and current conditions. |
| Risk check | Sizing uncertainty and writing invalidation rules | Risk controls reduce exposure; they do not remove loss. |
Research Checklist and Related Stackmode Lessons
Use primary sources for current rules and the related Stackmode pages for connected market context. The links are learning paths, not promises that a result will transfer from one market or person to another.
Visual Study Opportunities
These are useful visual checkpoints for a future revision or companion graphic. They make the explanation easier to scan without presenting an unverified chart, number, or performance claim as proof.
- 1. A one-sentence definition card with the key term highlighted.
- 2. A labeled process diagram showing research before execution.
- 3. A comparison table with the same criteria across alternatives.
- 4. A before-and-after example that clearly labels assumptions.
- 5. A timeline showing which facts are current and which are historical.
- 6. A risk ladder from low complexity to high complexity.
- 7. A checklist for source, date, cost, liquidity, and invalidation.
- 8. A worked example using hypothetical values rather than a promise.
- 9. A common-mistakes graphic with the correction beside each mistake.
- 10. A final decision tree showing when to pause and verify more evidence.
Expanded FAQ
What is the main idea of this article?
The main idea is to understand how professional traders use levels (the real method) as a process with defined assumptions, risks, and verification steps rather than as a guaranteed outcome.
Who is this article for?
It is for readers who want an educational framework before making a market, trading, or investing decision.
What should a beginner do first?
Start with the definition, identify the instrument or market involved, and write down the risk before thinking about an entry or action.
What information should be verified?
Verify the product rules, current data, costs, timing, liquidity, source date, and any claim that could change the decision.
What is the biggest mistake to avoid?
The biggest mistake is treating an educational explanation as a promise and skipping independent risk checks.
How does risk management fit in?
Risk management sets the position size, invalidation point, maximum loss, and review process before execution.
Can this approach guarantee a profit?
No. Markets are uncertain, and no framework can guarantee a profit or remove loss risk.
How current is this information?
Market rules, prices, products, and policy can change, so check the dated primary source before acting.
Should this replace professional advice?
No. It is general education, not personalized financial, tax, legal, or investment advice.
How should readers compare alternatives?
Compare the same criteria: purpose, issuer, liquidity, costs, volatility, custody, time horizon, and honest limitations.
What should be written in a trading plan?
Record the thesis, setup, entry condition, invalidation, size, maximum loss, exit logic, and review date.
Why do source dates matter?
A dated source shows when a rule, number, or statement was true and helps expose stale or unsupported claims.
Conclusion: Use the Framework, Then Verify the Decision
How Professional Traders Use Levels (The Real Method) is best understood as an educational framework: define the decision, compare the available choices, verify current evidence, and keep the downside explicit before acting. The useful takeaway is not a prediction. It is a repeatable process: define the topic, compare the available choices, verify current sources, size risk conservatively, and record what would change your mind.
Stackmode provides educational market context, not guaranteed returns or personalized financial advice. Recheck current rules, prices, liquidity, and tax implications before acting.
Free trading playbook
Build the plan before you place the trade.
Get the Stackmode playbook for pullbacks, risk limits, entries, exits, and trade review. It is a practical first step before you sign up for the Trading School.
- • Define the setup before entry
- • Mark invalidation and risk
- • Stop chasing moves
- • Review decisions, not just results
Opens the external Stackmode playbook page. Education only.
Trading Books
Keep Learning After The Article
Pick the book that matches the skill you want to practice next. Each one gives you a focused framework to work through after this article, with Amazon paperback and eBook options available.
Recommended starting point
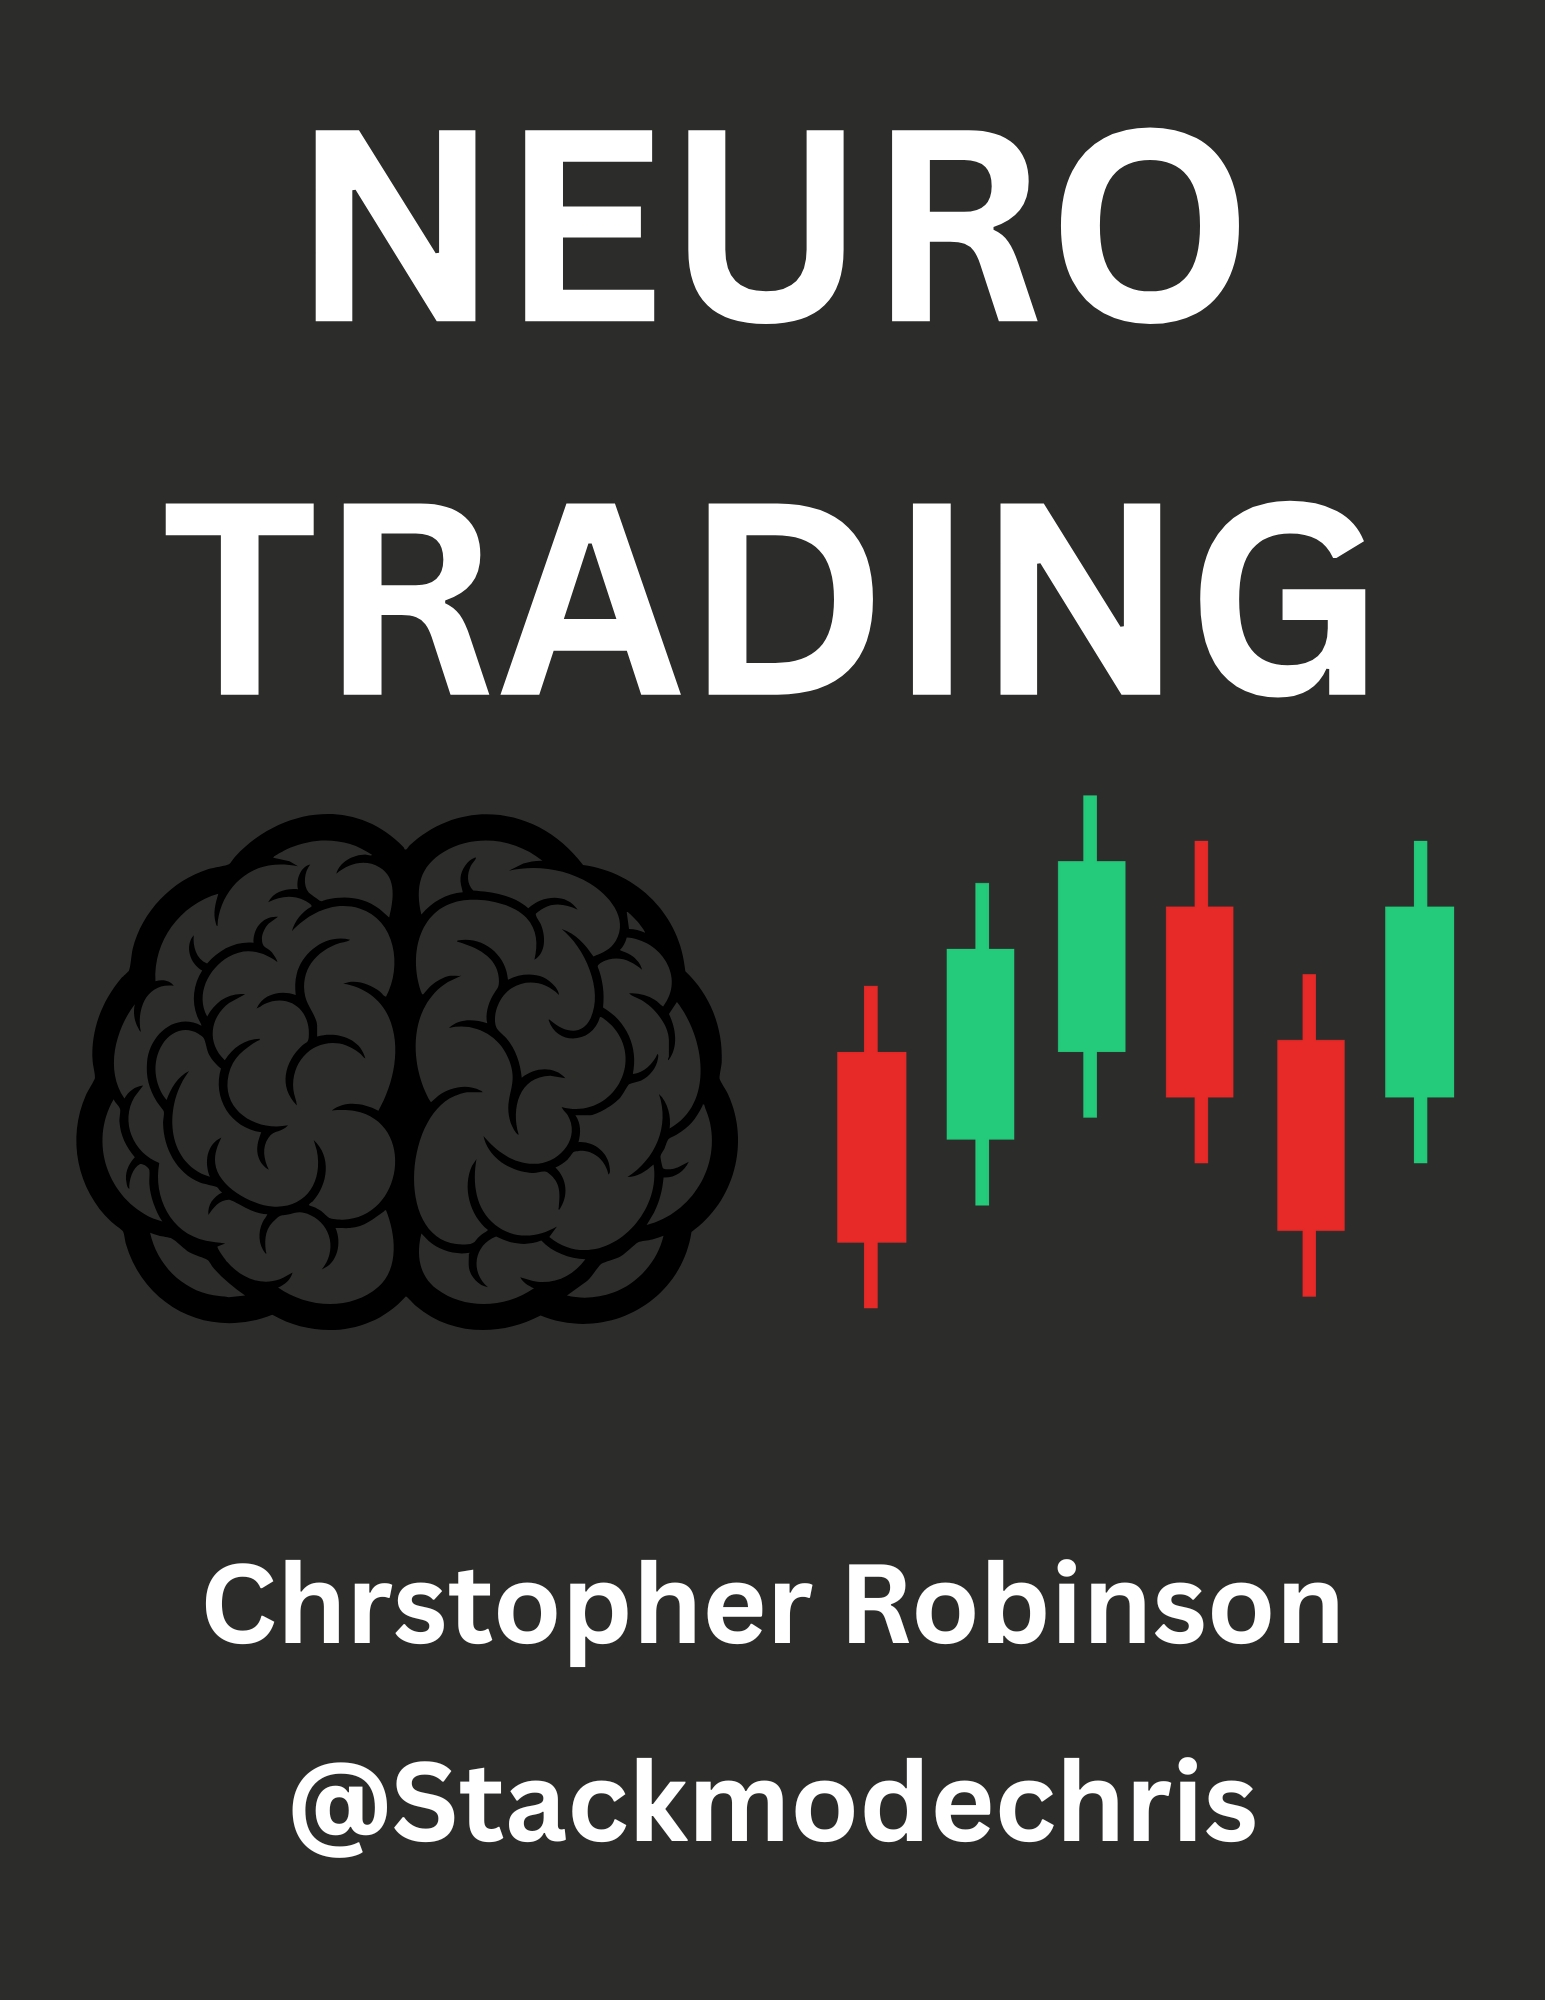
Neuro Trading
Master the psychology of trading.
- Why 90% of traders lose and how to think like the 10%
- Emotional discipline techniques used by stronger traders
- A mindset framework built for long-term execution
eBook
$9.99
Paperback
$19.99
Audiobook
$9.99

Before The Hype
How to spot opportunities before they go viral.
- Learn the asset stacking strategy for long-term wealth
- Find high-signal trends before they become crowded
- Think earlier instead of chasing late momentum
eBook
$9.99
Paperback
$19.99
Audiobook
$9.99

Freedom Money
Understand Bitcoin and what it does.
- A cleaner beginner path into Bitcoin
- Protect and grow money with stronger awareness
- Build conviction before you move capital
eBook
$9.99
Paperback
$19.99
Audiobook
$9.99
Trade Like a Professional — Not a Guesser
Pick one clean next action instead of bouncing around the site.
START HERE
Stackmode Trading School
Join the school for live classes, market review, organized lessons, StackFinder access, and member support. $499/year — StackFinder included.
Best value
StackMode Trading School
Live group sessions, stock and crypto market review, organized video lessons, StackFinder access, and a Halal spot-trading framework. $499/year.
Live class plan
Live Group Sessions Included
Bring questions, review charts, and learn the same repeatable process with students moving through the class plan together.
StackFinder
StackFinder Member Tools
AI scanner, personal watchlist, daily stock and crypto setups, dashboards, and trade-prep tools are included with the group.
Education and risk disclosure
Stackmode provides education, tools, examples, and market commentary only. Nothing on this site is personalized financial, investment, tax, or legal advice, and no result, trade recap, screenshot, testimonial, alert, or example is a promise of future performance. Trading and investing involve substantial risk of loss, including the possible loss of capital. You are responsible for your own decisions, position size, broker selection, tax treatment, and compliance with the laws and rules that apply in your location.
Read the full risk disclosure